Have received lots of questions about the nursery, so here's the scoop on what and where:
Fabric: The curtain/bedskirt fabric is from Hancock Fabrics. It's really sturdy indoor/outdoor fabric that comes on huge rolls in the furniture upholstery section. Ungodly expensive (particularly if you're sewing-challenged and buy 15 yards, which is about 10 yards too much). We loved how the wavy lines looked like waves and the multicolored circles looked like bubbles.
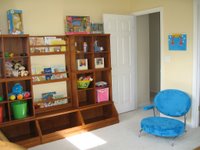
Low blue and green chairs: They're funky faux-fur chairs from Linens and Things. Incredibly comfortable for adults, and low enough for kids (and apparently cats). Plus, the colors make us grin.
Storage units: They're Cameron Bookrack Wall Systems from Pottery Barn Kids. We got the Espresso color for the playroom and the Sun Valley Honey color for the nursery. Great quality, and just the right height for kids. The lower "toss bins" are my favorite part. We drilled right through each piece to bolt each component into a wall stud. One warning: these units come unassembled, in about 10 huge boxes filled with rigid styrofoam. We called around and found a local recycling place where we could just dump the boxes. Whew.
Green & blue dolphin bureau: The kid-sized bureau is from a funky little furniture store in San Luis Obispo called Bali Designs. Our piece came from Indonesia.
Monday, October 02, 2006
Black baby gate
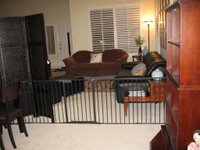
Our ginormous playroom gate is a Kidco Hearthgate, just Google those words and you'll find a whole bunch of online stores selling it. It fits all the way across our room to divide the playroom (shown here in progress) from the living room.
What we love about this gate:
- It's black!
- Made of solid, sturdy, coated, smooth metal
- Spans a HUGE opening and you can also buy extensions (we bought one)
- Has a little baby-proof door in it so we can easily step through
- Can set it up in a straight line, curved line, or any zig-zagged or any bent configuration
- Comes with a kit to bolt it directly to the wall on both sides
Sunday, October 01, 2006
Flickr collage/thumbnails hack job
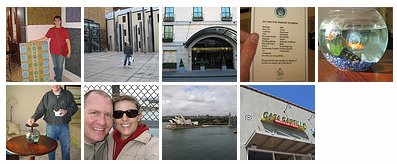
I keep getting asked "how do you get Flickr to do that little photo collage/thumbnail thing on your blog?" Well unfortunately the answer is "I don't really." It's a total hack job I made up because I couldn't get Flickr to do what I wanted and I didn't want to have to cut and paste the Flickr code for every single picture when I uploaded a whole bunch of them. Here's an example:
Australia Day 5 Pictures:
(View thumbnails, detail, or slideshow)
And here's how I do it:
1. Upload your new pictures to Flickr and put them in a "set"
2. While you're viewing the new set take a screenshot of the page (I hold down the "alt" and "PrtScn" keys on my pc, not sure how you do it on a Mac)
3. Open Photoshop, create a new document, paste in the screenshot, crop it so only the tiny thumbnail pics are showing, then Save As a jpg
4. Create a new Blogger post and upload the jpg you just made into that post
5. Once that jpg is loaded into your blog post, you can click on the picture then click on the Blogger "link icon" (kind of looks like a little chain link) and put in the url for your Flickr set (either the url of the Flickr thumbnail page, the detail page, or the slideshow page, your choice)
6. As an additional option, you can type in "thumbnail, detail, slideshow" below the picture and link those words up to the appropriate Flickr urls
7. Publish your post, wipe the sweat off your brow, and relax with a nice, cold drink...